Getting one of these great little 3D printers working correctly can be quite a mission. I think I’ve worked out most of the kinks though, so here are my quick fixes.
Extruder Clogged
The extruder motor is turning the gear correctly and the motor isn’t skipping.. what next? Most likely you have a clog, which can occur from either dusty filament or uneven filament.
- Heat up the hotend to 200°C or so.
- Remove the extruder from the head. You need to undo the 2 hex screws that hold the top of the extruder in, then wiggle it loose. You should be able to leave the Phillips head screws in place.
- Now try and push the filament through, directly into the barrel. Likely it won’t move.
- I found that with a thin nail I could push filament through a bit better.
- If you still don’t have plastic spaghetti coming out, remove the hot end tip with a spanner and check if you can push the filament through now. It should push through pretty easy, otherwise go back to step 4 and find something to open up the extruder neck.
- Get a jet burner and flame the crap out of the tip. Don’t burn yourself or your stuff. You should hopefully see a small glob of black plastic crud drop out.
- Put the tip back on the extruder and try push through some filament again. It should come out correctly now.
Now I attach a bulldog clip with a make up remover pad inside it to the filament to clean it before its pushed into the extruder. Cotton wool would probably work, use what you can find around the house.
Y-Axis Sag
You are suffering from Y axis sag if your bed is level but the tip is hitting the bed when it is fully extended on the Y axis, but a bit above the bed when fully retracted. This is generally because the cable ties holding the steel rods have expanded during use, or were never tight enough to begin with.
- Grab the printers arm and see if it wiggles. It should.
- Tighten all 6 cable ties using a set of pliers. Grab the end of the cable tie while holding the other end and make it REAL tight.
- If you cut off the cable ties real close to the bearings, it might be possible to use some tweezers to grab just a tiny bit of the tail and stretch the plastic out to something you can grab with normal pliars.
- Notice that you can’t wiggle the printer’s arm as much as before.
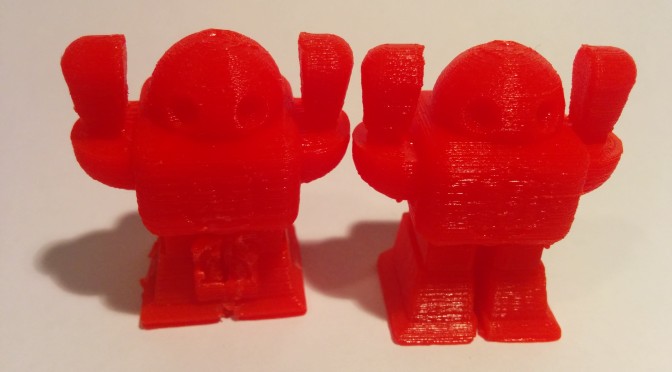
Wrong Size Prints
You need to calibrate the printer, see http://zheng3.com/2013/06/02/calibrating-the-printrbot-simple/ for a good guide.
Negative Space Test
See: http://help.printrbot.com/Answers/View/15079/Printer+filling+in+gaps+and+having+trouble+with+circles
The default steps for a Simple 2013 are M92 X84.4 Y84.4 Z2020 E94.5